Monday, December 21, 2015
Holiday/Season Capture
I used portrait mode to take this photo. This photo conveys the holidays because it's subject is Santa's sleigh. It also shows how Christmas puts people in the spirit of giving because the sleigh is filled with donated coats for a coat drive.
Friday, December 18, 2015
Photo of the Week #2
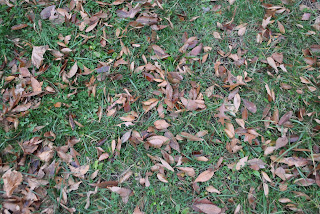
I chose this photo because I found the angle to be interesting. I liked how only the bottom half of the plant showed and that there was little empty space. I also liked the pattern that the overlapping leaves created.
Patterns in Nature
The decisions I made when taking this photo were to use portrait mode and to take it zoomed out. This made it focused and allowed the lens to capture a broad range of the pattern. This is not a good photo because the colors are dull and the subject of the photo is boring.
Thursday, December 3, 2015
Tuesday, November 24, 2015
Framing
Framing enhances a photo by creating a focus on the subject. I chose my frame because I thought it would be interesting to have the subject's head show through a single link in the fence. The frame made her stand out by completely surrounding her head on all four sides, and having it in the center. A draw back to using a frame was that it was difficult to make the camera focus on the subject, and not the frame, because the frame was in front of her.
Thursday, November 19, 2015
Tuesday, November 17, 2015
Group Photo
I took this photo of our group sitting on a staircase. I made sure that we were against a background in which no one blended it. Overall, I'm not pleased with the outcome of this photo because it lacks creativity and certain subjects do not look like they are ready to be photographed.
Positives
1. Everyone is looking directly at the camera.
2. Everyone stands out against the background.
Negatives
1. A few people are not smiling and appear to not be ready.
2. Certain parts of the photo, such as Bryan's hands and Rosemary's face, are blurry
Monday, November 16, 2015
Self Timer Self Portrait
3 Tips I would Recommend for a Photographer Who is Taking a Self Timing Photo:
1. Plan out the poses and position of your subjects beforehand.
2. Adjust the zoom and height of the camera to best accommodate where you plan your subjects to be.
3. Set the timer to give you enough time for your subjects and yourself to position themselves before the photo is taken.
Tuesday, November 10, 2015
Patterns
Patterns
Interrupted Patterns
My favorite photo was the one of the missing tile amongst all the light blue tiles. This is because it is easily noticeable due to the contrast of light and dark colors. It also shows a large amount of tiles, which aids in helping the missing tile stand out.
Wednesday, October 28, 2015
Friday, October 23, 2015
Action Photographs
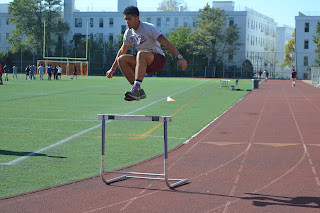
The multiple shot mode effects the quality of the photo by allowing it to show a moment which would normally not be able to be captured otherwise. The hardest part of taking an action photo was being prepared to take the photo at the time in which the action is occurring.
Monday, October 19, 2015
Contrast
I created the composition by standing directly between the football field and track. This photo is organic. I put the mode dial on landscape. This is because the subject of the photo takes up a wide range of view and makes up the majority of the photo.
Thursday, October 8, 2015
Rule of Thirds
Monday, October 5, 2015
Night Portrait
Without Tripod
With Tripod
The second photo is clearer because the "Aquafina" is more focused and the colors are bolder. You can also see the water droplet pattern on the machine easier and it looks more detailed. The lines appear to be cleaner.
Wednesday, September 30, 2015
Use of Landscape Mode
I decided on the subject for my photo because I wanted to have the football goal post in my photo because it was far away so it showed that the photo had a deep depth of focus. I was also intrigued that I could see both the football field and track from the angle in which I was standing. I was not very happy with the outcome of my photo because it was not focused enough and looks pixelated.
Monday, September 28, 2015
Landscape versus Portrait
Portrait
Portrait mode changes the photo by focusing on only the subjects, and blurring the tree and structure in the background. This makes the subject the focal point of the photo and directs the eyes towards it.
|
A time where landscape mode would be a better choice than portrait mode is when photographing a scenic subject, such as mountains or an ocean. This is because there is no principal point of attention, so the entire photo should be in focus. Landscape mode will make the entire photo clear throughout.
Tuesday, September 22, 2015
Depth of Focus
In order to take this photo, I first positioned Mahawa about two feet from a bulletin board, and stood two feet away from her myself. I turned the mode dial to Portrait mode. I held the shutter button down lightly first to focus it, and then pressed it down all the way to take the photo. The only part of the photo that is in focus is Mahawa's hand. This makes it stand out because all the other parts of the photo are blurred. A problem I encountered while taking the photo were deciding how far Mahawa should stand from the wall, and how far I should stand from Mahawa when taking the photo. Another problem I encountered was figuring out how to make the camera focus on the hand only. Overall, the quality of this photo is fairly good, but there is still room for improvement.
Subscribe to:
Posts (Atom)


